ML Detection
ML Detection enables real-time object detection in Unity using TinyYOLO v3 and NatML. Classify objects in images with built-in visualization tools for UI rendering, making it straightforward to integrate computer vision capabilities into your projects without external dependencies.
com.natsuite.ml.detection Install via UPM
Add to Unity Package Manager using this URL
https://www.pkglnk.dev/detection.git 
README Markdown
Copy this to your project's README.md
## Installation
Add **ML Detection** to your Unity project via Package Manager:
1. Open **Window > Package Manager**
2. Click **+** > **Add package from git URL**
3. Enter:
```
https://www.pkglnk.dev/detection.git
```
[](https://www.pkglnk.dev/pkg/detection)README
ML Detection
This is a library for classifying images in Unity Engine using NatML. The following ML models are included:
Setup Instructions
This package requires NatML, so make sure NatML is imported into your project. Then in your project's Packages/manifest.json file, add the following:
{
  "dependencies": {
    "com.natsuite.ml.detection": "git+https://github.com/natsuite/ML-Detection"
  }
}
Detecting Objects in an Image
First, assign the object detection model (in the ML folder) to an MLModelData field in your script:
using NatSuite.ML;
using NatSuite.ML.Vision;

public class Classifier : MonoBehaviour {

    public MLModelData modelData; // Assign this in the Inspector
}
Then create a detection predictor corresponding to the model:
void Start () {
    var model = modelData.Deserialize();
    var predictor = new TinyYOLOv3Predictor(model, modelData.labels);
}
Detect objects in an image:
Texture2D image = ...;
(string label, Rect rect, float score)[] detections = predictor.Predict(image);
Visualizing Detections
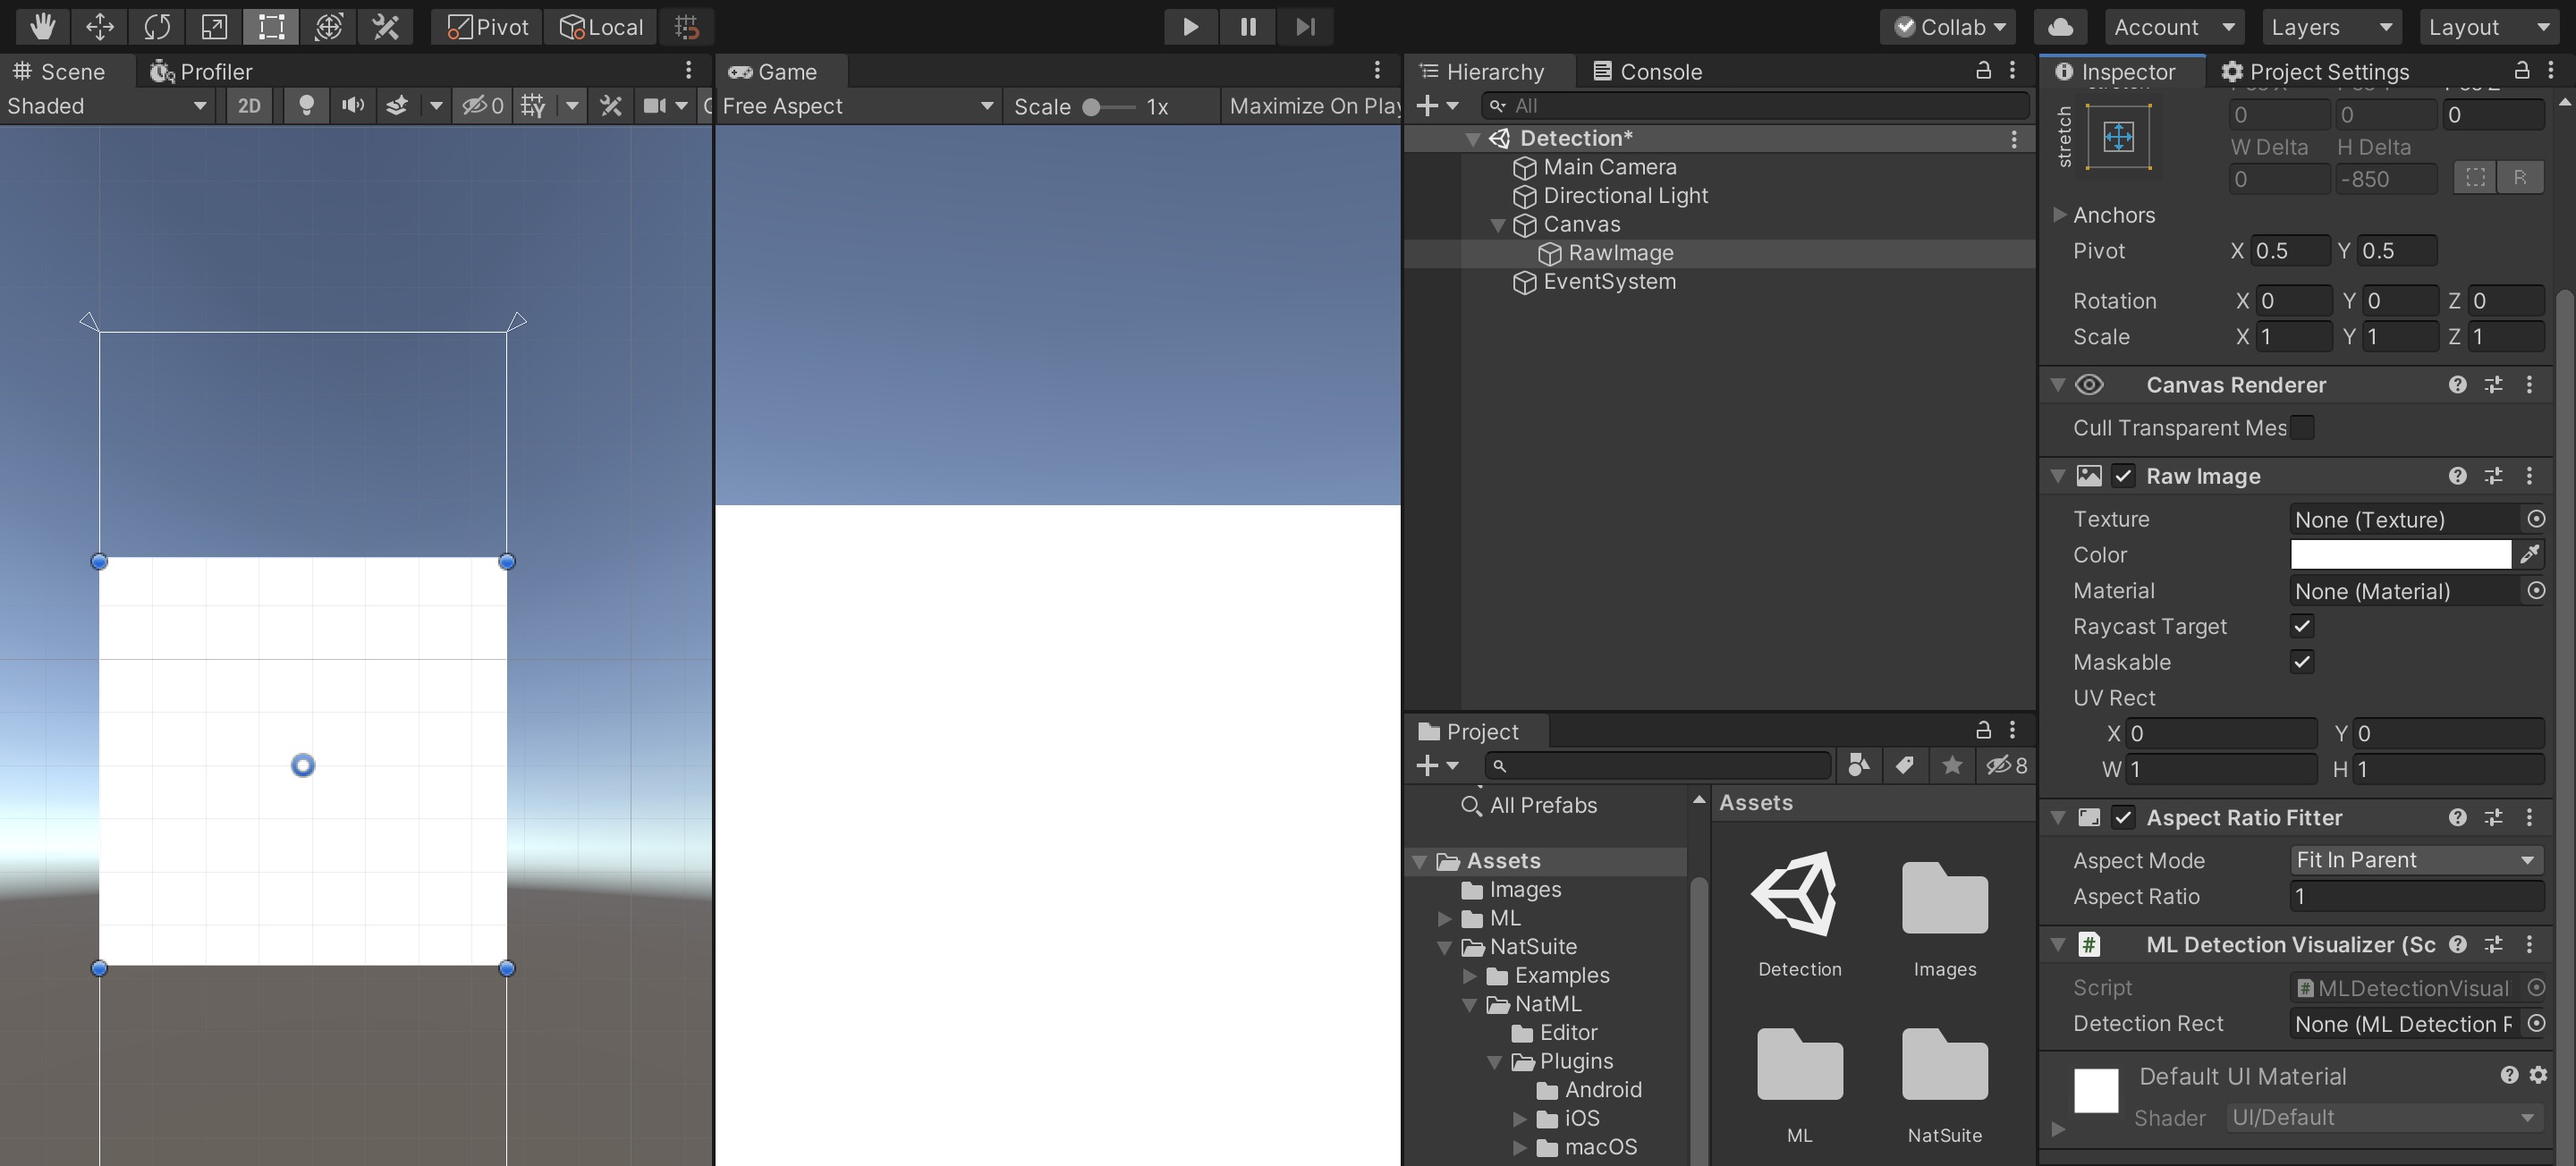
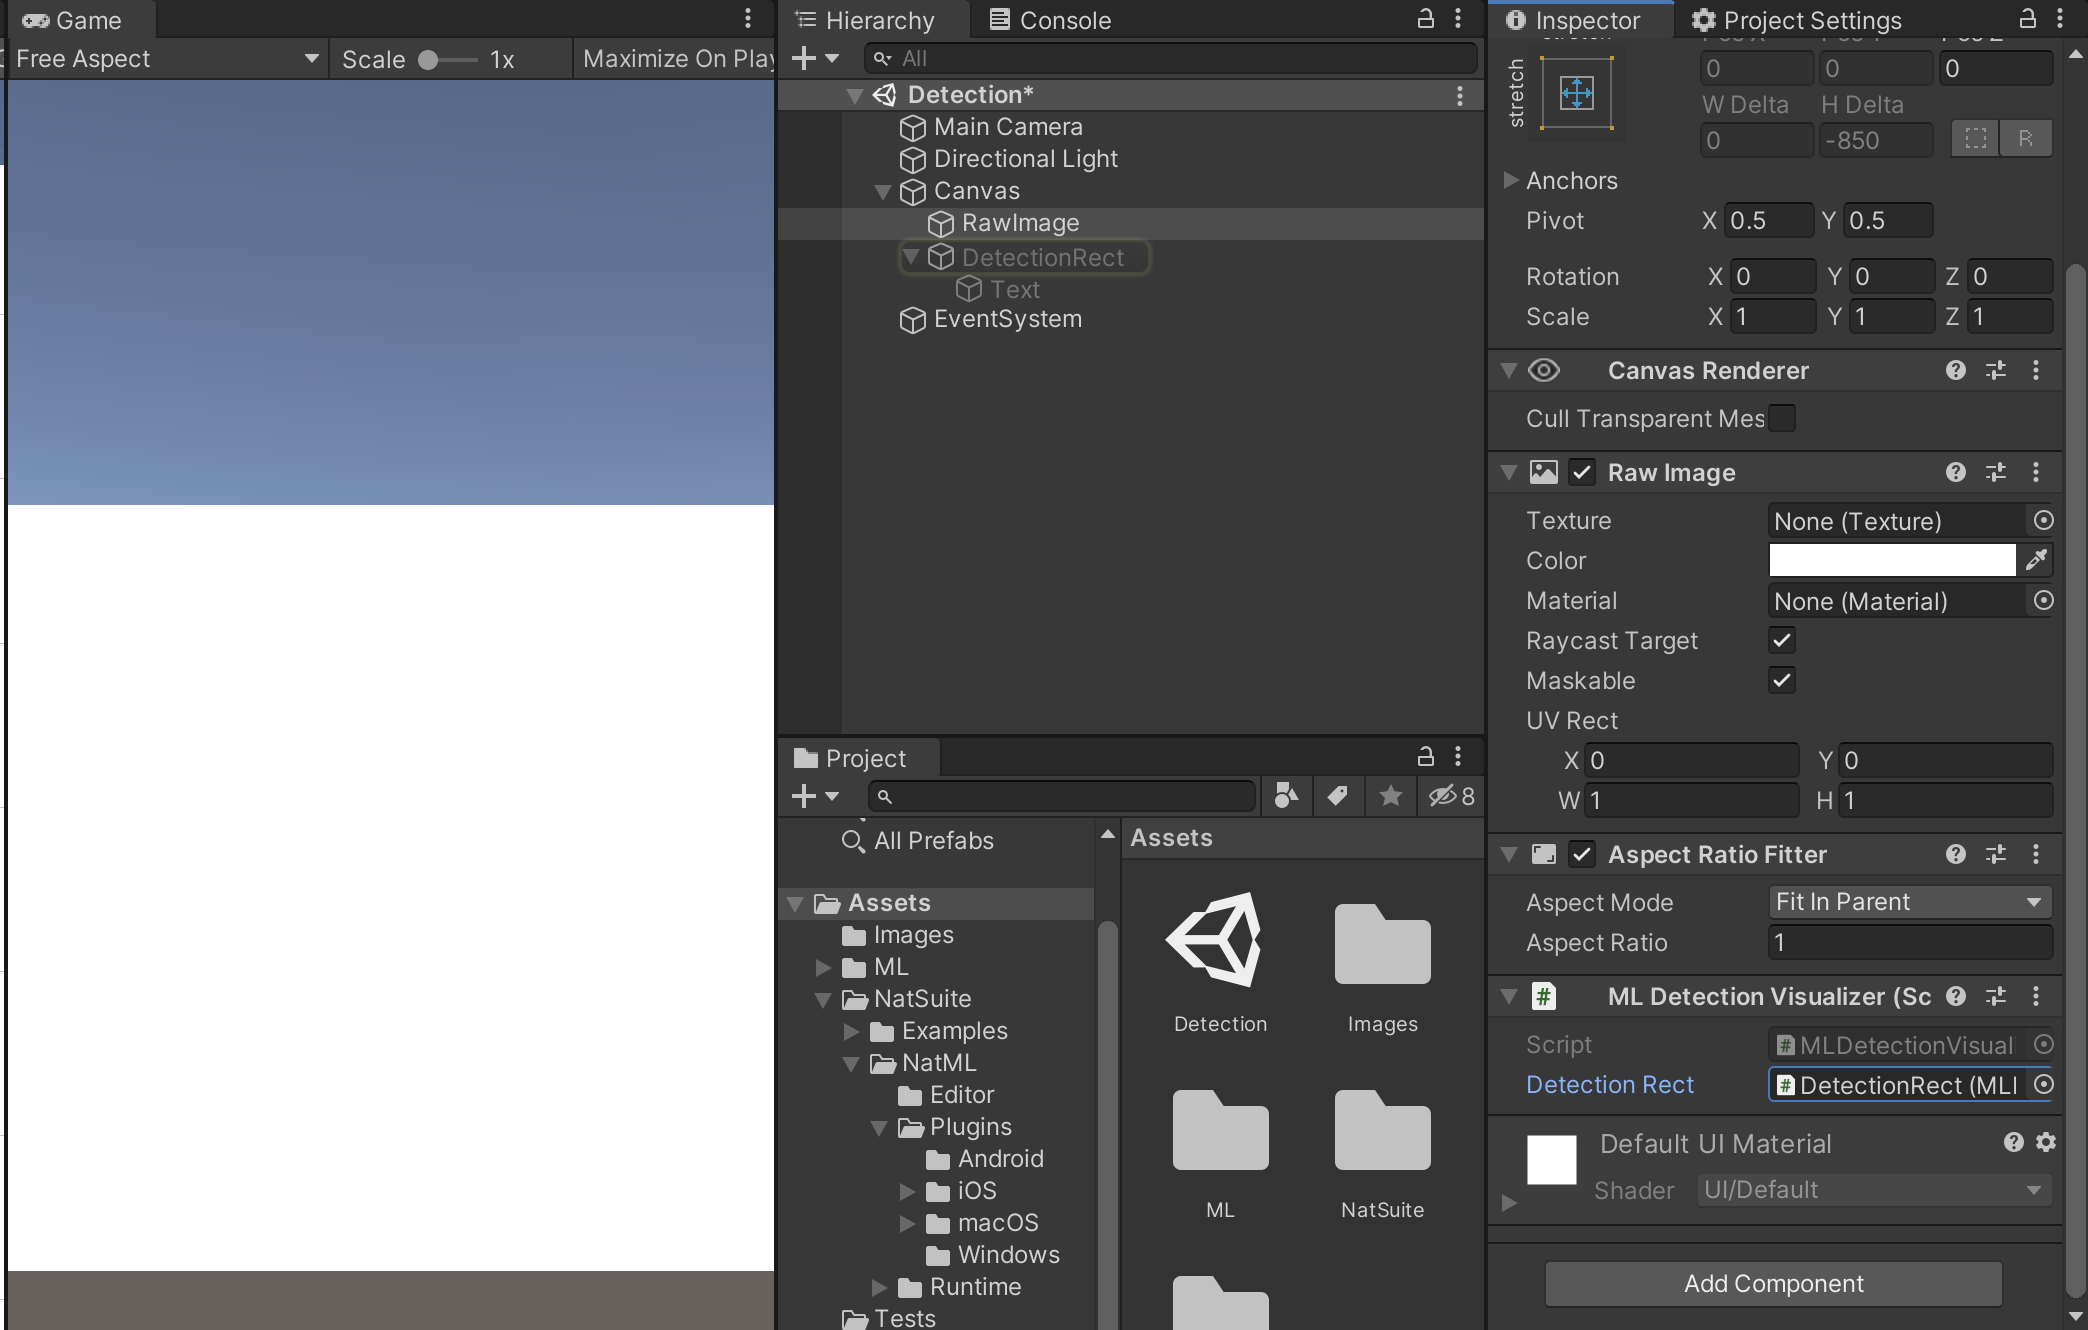
To visualize the detections, we will use Unity UI along with Visualizers included in NatML. First, create a UI RawImage to display our image. Then add an MLDetectionVisualizer component:
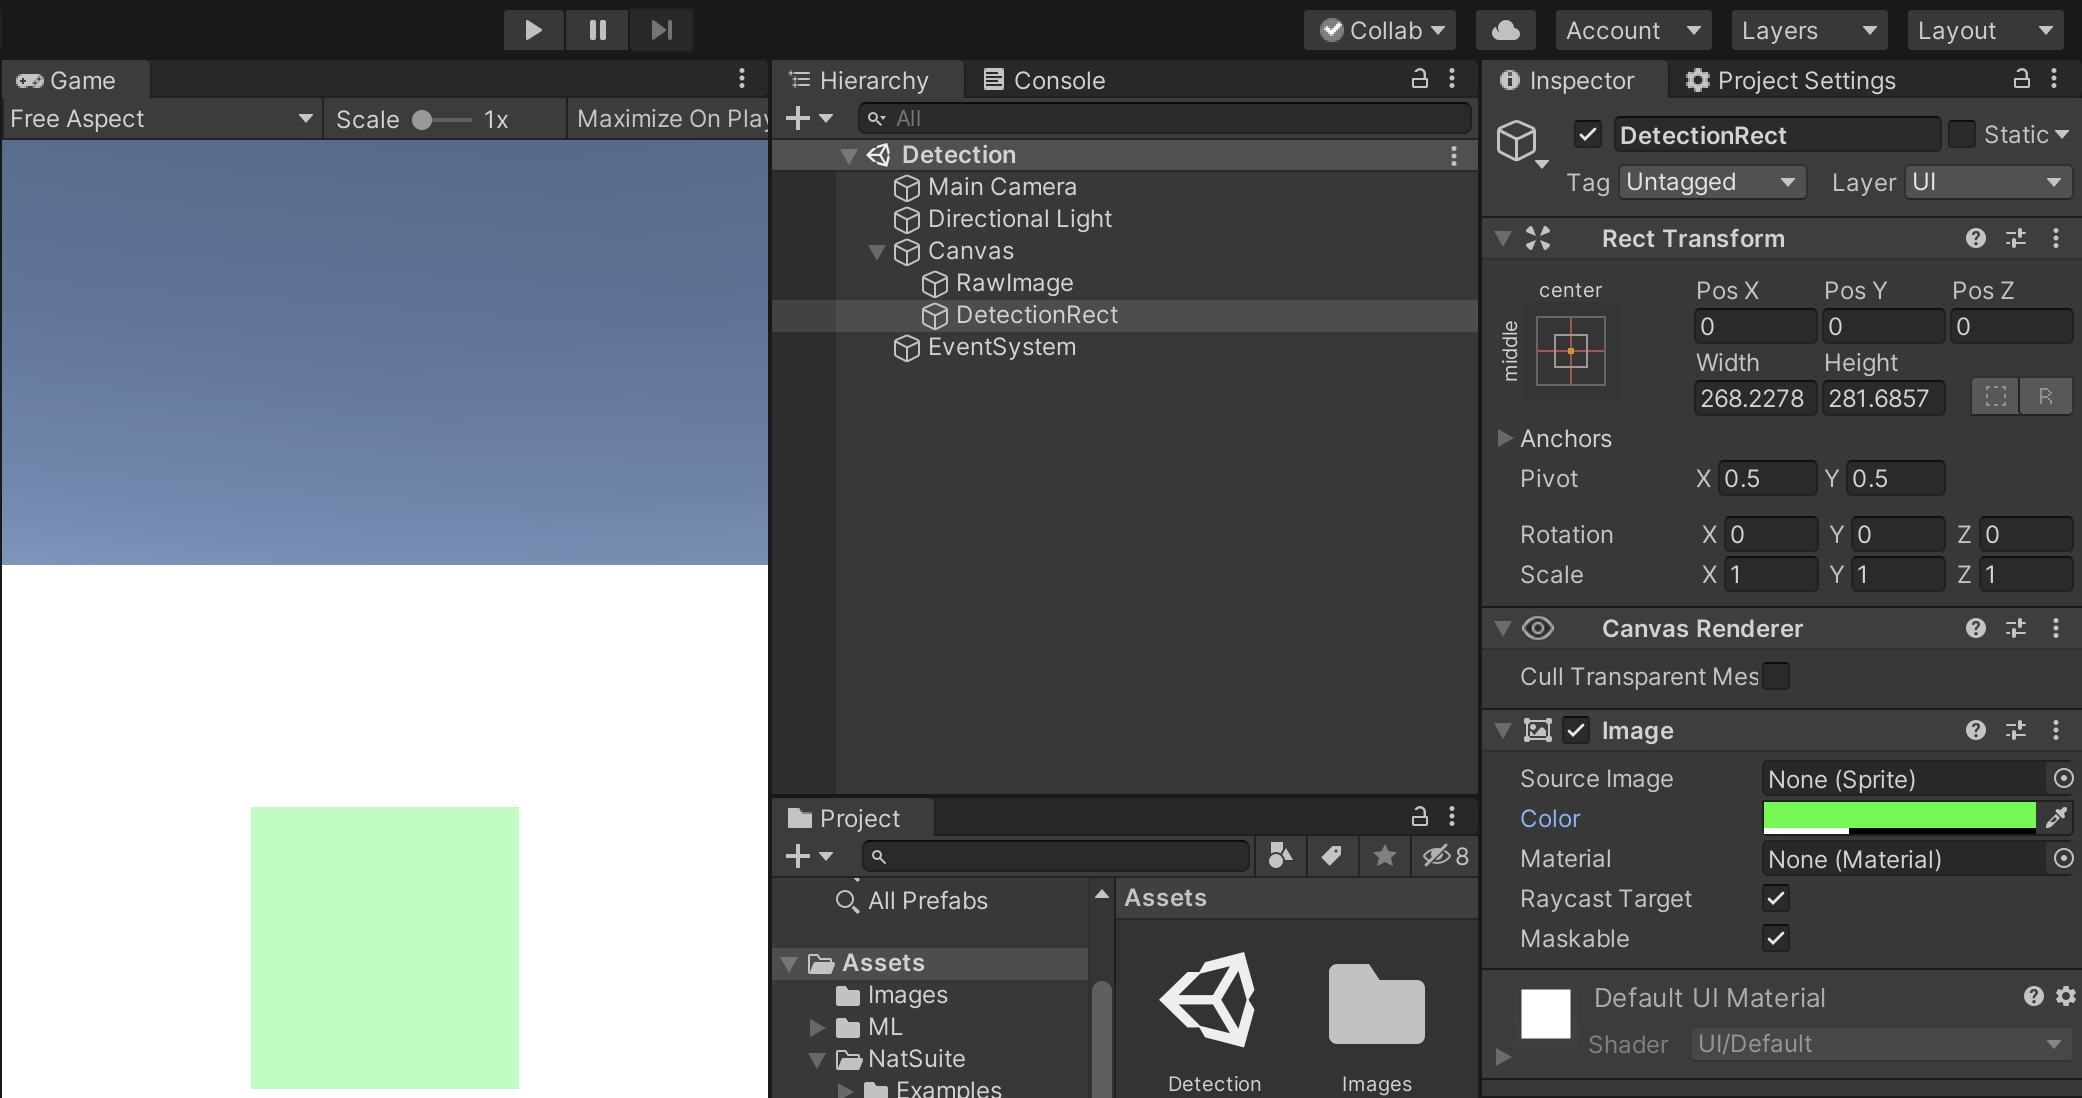
Next, we have to create a prefab rectangle that will be instantiated for every detected object. You can customize this as you desire, but for this example we will create a simple semi-transparent UI rectangle:
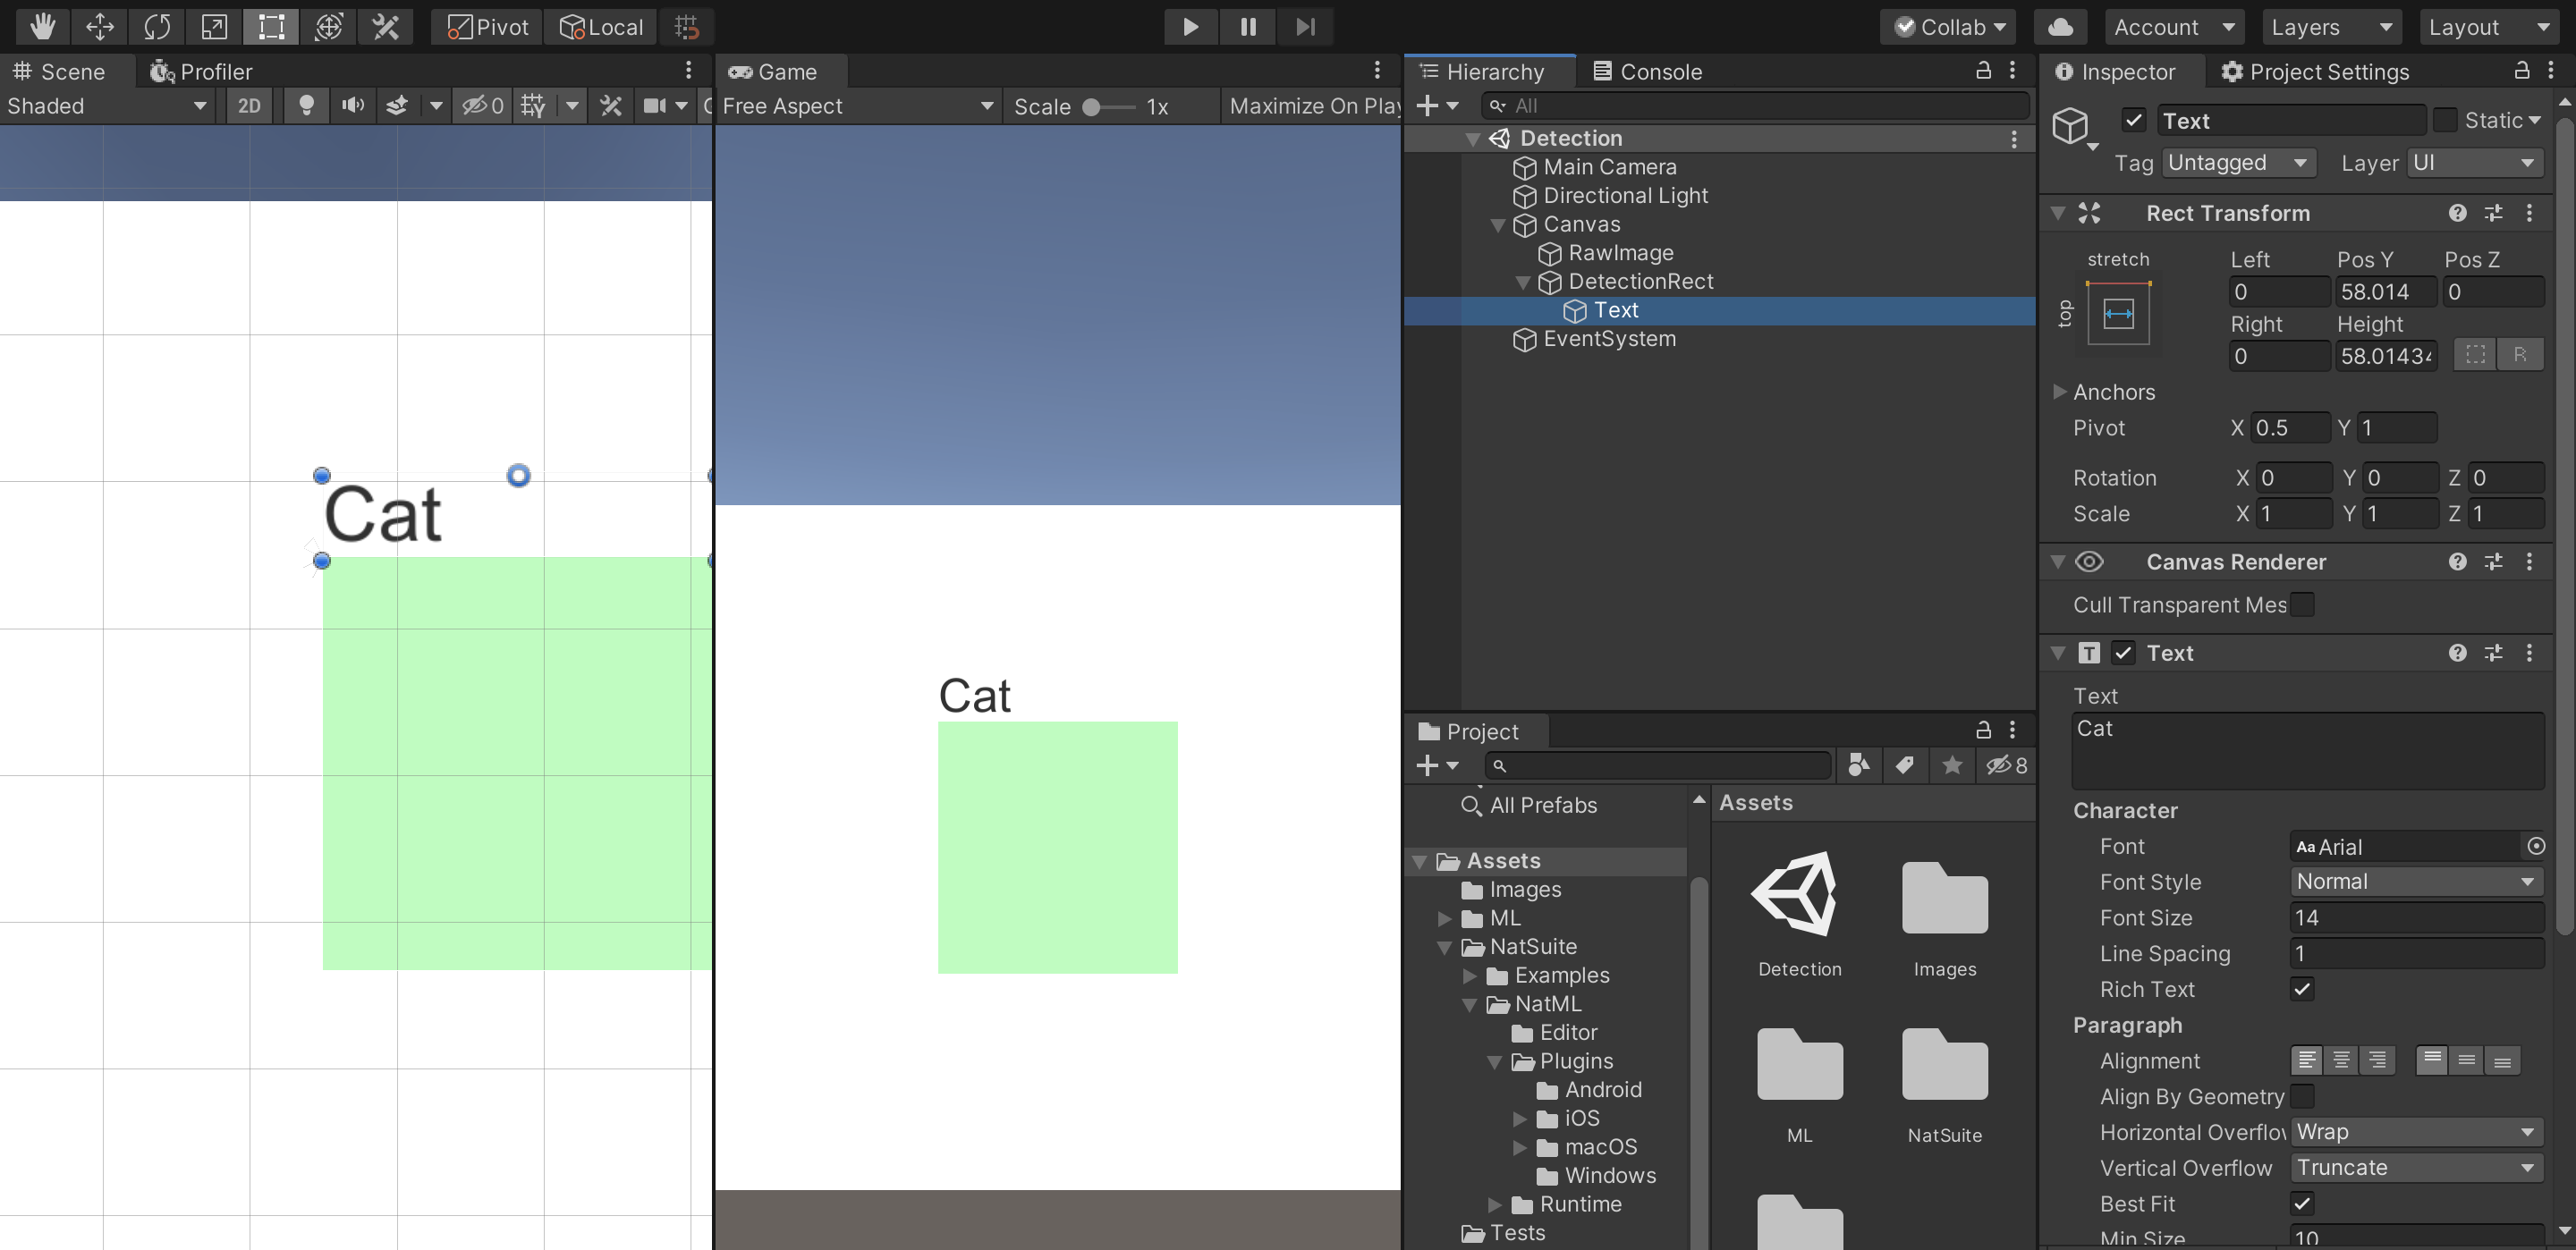
We need to add a UI text that will display the detected object's label:
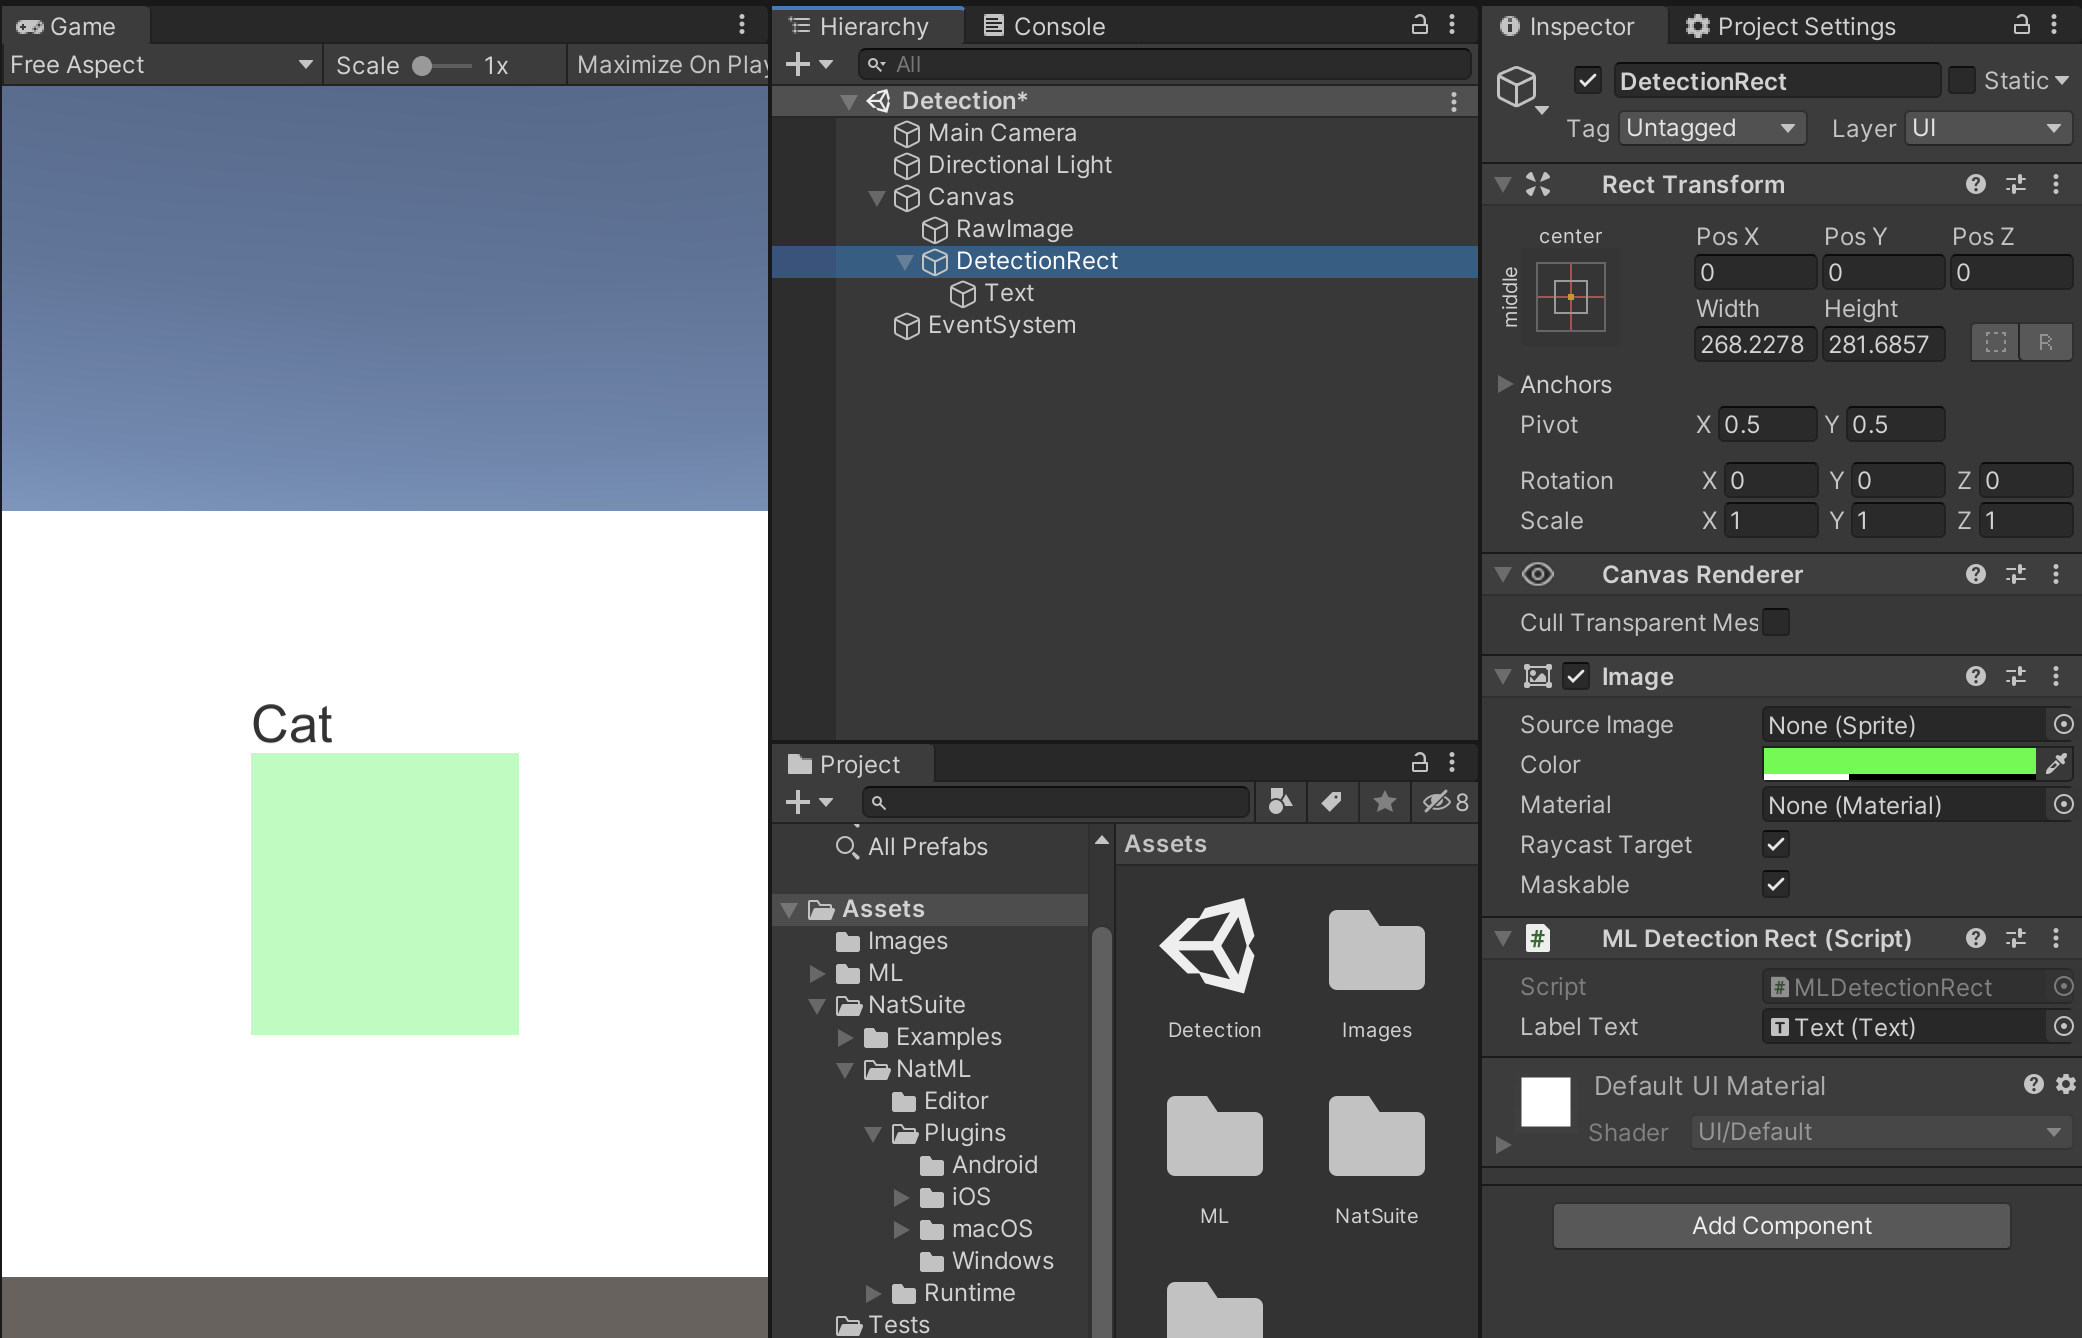
Now, add an MLDetectionRect component to our prefab and assign the Label Text field:
Finally, assign the prefab to the MLDetectionVisualizer and disable it in the scene:
Now, we're ready to visualize detected objects. To do so, simply call the Render method on the visualizer:
using System.Collections.Generic;   // For access to `List<>`
using NatSuite.ML.Visualizers;      // For access to `MLDetectionVisualizer`

MLDetectionVisualizer visualizer;   // Assign in Inspector

void Detect () {
    // Detect
    Texture2D image = ...;
    (string label, Rect rect, float score)[] detections = predictor.Predict(image);
    // Visualize
    var visualizations = new List<(Rect, string)>();
    foreach (var (label, rect, confidence) in detections) {
        var visualizationText = $"{label}: {confidence}";
        visualizations.Add((rect, visualizationText));
    }
    visualizer.Render(previewTexture, visualizations.ToArray());
}
Requirements
- Unity 2019.2+
- NatML 1.0+
Supported Platforms
- Android 7.0 Nougat or newer (API level 24+)
- iOS 13+
- macOS 10.15+
- Windows 10 64-bit
Quick Tips
- See the NatML documentation.
- Join the NatSuite community on Discord.
- Discuss NatML on Unity Forums.
- Contact us at hi@natsuite.io.
Comments
No comments yet. Be the first!
Sign in to join the conversation
Sign In